Children’s drawings are filled with wild imagination, bold colors, and heartwarming creativity. Turning these unique artworks into handmade amigurumi toys can be one of the most meaningful projects for crafters and parents alike. Not only does this transform a two-dimensional creation into a huggable keepsake, but it also celebrates a child’s vision in a deeply personal and lasting way.
In this article, we’ll guide you through the steps to bring children’s artwork to life in the form of custom amigurumi, offering both technical and creative advice.
Step 1: Choose the Right Drawing
Select a drawing that has clear, distinctive elements. It doesn’t need to be perfect or realistic—in fact, the more whimsical and imaginative, the better! Look for defining features such as:
- Large eyes, limbs, or accessories
- Unique shapes or patterns
- Recurring color themes or facial expressions
Consider asking the child to describe their drawing. Their explanation can give you more insight into what to emphasize in your amigurumi version.
Step 2: Simplify the Design for Crochet
Most children’s drawings are highly detailed or abstract. To translate them into crochet, you’ll need to break the image down into basic shapes:
- Circles (heads, eyes, buttons)
- Tubes (arms, legs, tails)
- Rectangles or ovals (bodies, wings, capes)
Sketch a simple version of the character using geometric forms. This will help you visualize how to build the amigurumi in sections.
If you’re confident with pattern writing, you can create your own from scratch. If not, look for base amigurumi patterns you can modify with new features.
Step 3: Select Materials that Match the Art Style
Match the feel and look of the drawing with your yarn and materials:
- Bright yarns for colorful characters
- Textured yarn (like boucle or velvet) for soft or fuzzy drawings
- Embroidery thread for tiny details or names
- Felt or fabric for clothes, capes, or wings
Consider safety if the toy is for young children: use embroidered eyes instead of plastic safety eyes, and securely stitch all pieces.
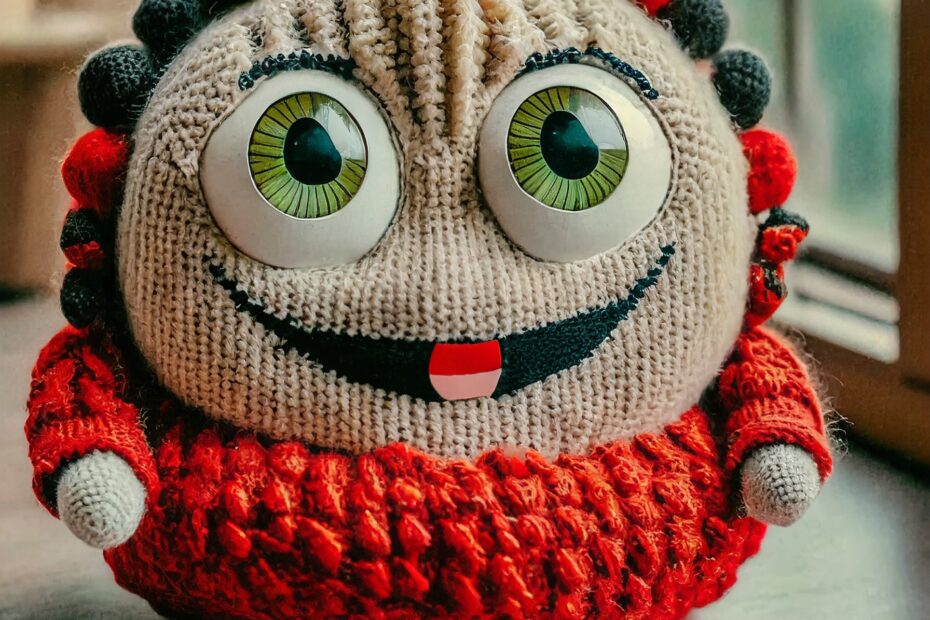
Step 4: Pay Attention to Details and Expression
Facial expressions, accessories, and color placements are what make the toy recognizable to the child. Be sure to:
- Match eye size, color, and position
- Recreate any unique marks like stars, hearts, or patches
- Mimic the expression (smile, frown, raised eyebrows)
This attention to detail is what transforms a good amigurumi into a magical recreation.
Step 5: Involve the Child in the Process
If possible, let the child be part of the project:
- Show them the yarn options and let them pick colors
- Ask for their input as you shape the toy
- Let them name their toy once finished
This collaborative experience adds emotional value and builds excitement throughout the process.
Step 6: Personalize the Final Toy
Add a label or tag with the child’s name and the date the drawing was made. You can also attach a mini laminated version of the original drawing to keep them together.
If you’re gifting the toy to someone else (like grandparents or teachers), include a framed copy of the drawing alongside the amigurumi.
Transforming children’s drawings into amigurumi is a joyful and creative process. It brings their imagination to life, celebrates their individuality, and creates a deeply cherished keepsake. Whether you’re doing it for your own child or as a custom order business, each toy is a one-of-a-kind treasure.
With a bit of planning, patience, and love, you can turn a crayon masterpiece into a cuddly friend that lasts a lifetime.